Data Import |

|

|
|
Data Import |
|
|
Data Import |
|
|
|
Data Import |
|
|
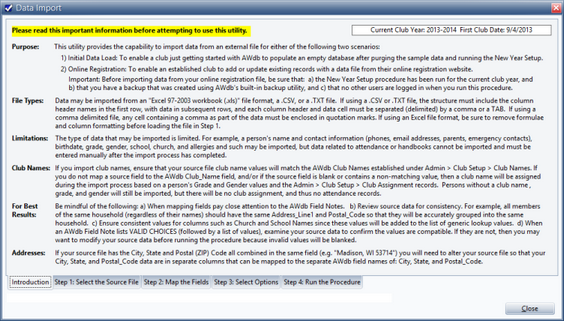
![]() Use this utility to import data from an external file for either of the following two scenarios:
Use this utility to import data from an external file for either of the following two scenarios:
| 1. | Initial Data Load: populate an empty database after purging the sample data and running the New Year Setup. (For new users of AWdb.) |
| 2. | Online Registration: add or update existing records with a data file from an online registration website. (For existing users of AWdb.) |
|
Before importing data from an online registration file, be sure that:
|
The Introduction page provides important information about File Types, Limitations and Club Names, as well as tips For Best Results and format information for Addresses.
|
Please read this page carefully! Not reading the instructions could result in problems with your data. |
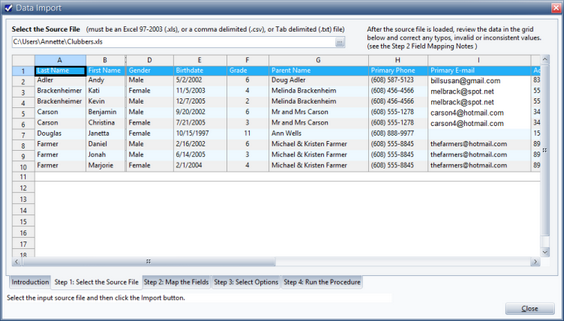
Use this page to identify the source file of the data to be imported. After the file is loaded, review the data in the grid and correct any typos and invalid or inconsistent values. See the Field Mapping Notes in Step 2 for specific requirements of each field. Return to Step 1 to edit data as needed.
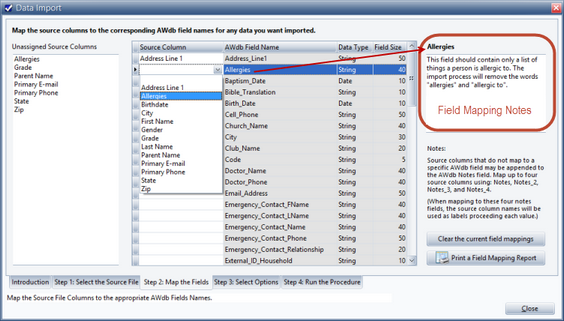
Use this page to map the source columns to the corresponding AWdb field names. On the left is a list of the Unassigned Source Columns. In the grid, identify the Source Column for an AWdb Field Name. Information about Data Type and Field Size are given as well as specific information about mapping the source data to that field.
|
Please read the mapping notes for each field carefully to assure data is in the correct format and that you understand how each field is used. |
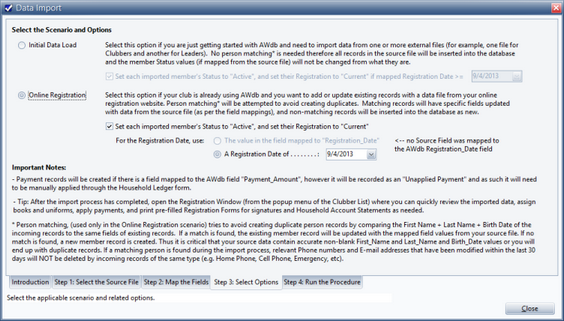
Use this page to select to import as an Initial Data Load or from Online Registration. Detailed descriptions are included as well as Important Notes.
Once the setup is complete, use this page to run the Data Import Procedure.

| 1. | After reading any reminders or warnings on the screen, click Begin Processing. A log showing the steps of the import process is generated. |
| 2. | Once the Data Import is done, read the log to make note of any items that might need to be reviewed. Print or Save the log if desired. |
| 3. | Click Close when finished. |